

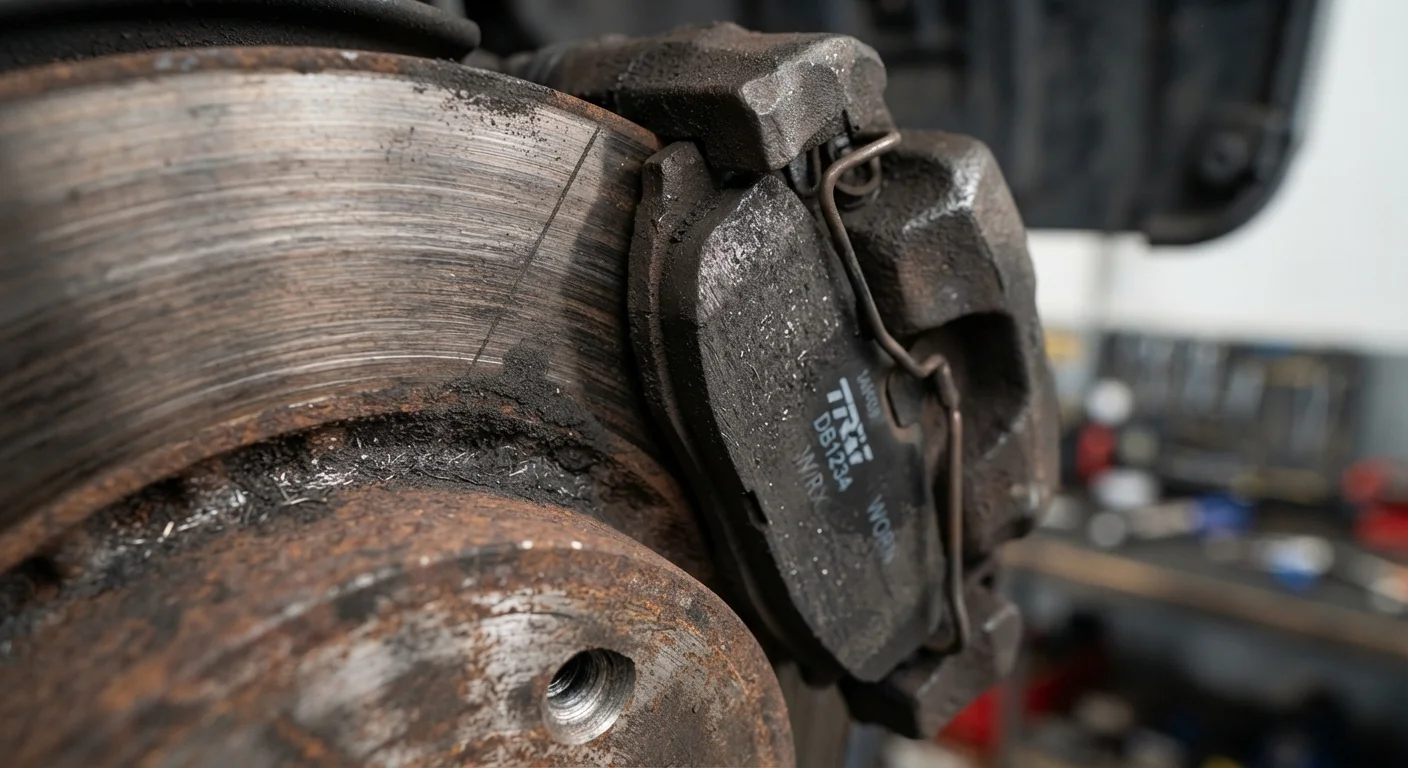
Why Brake Wear Awareness Matters
Your braking system is the single most safety-critical mechanical system on your vehicle. Unlike a check engine light or a tire pressure warning, brake pad wear doesn't always trigger a dashboard alert - it communicates through sounds, sensations, and visual cues that you have to know how to read. The good news is that these signals are consistent, learnable, and early enough to act on before damage escalates.
As the brake system overview explains, pads are the wear component designed to be replaced - they press against the rotor to create stopping friction, and they gradually thin over thousands of miles. Most modern pads start at 10-12mm of friction material. By 2-3mm, replacement is overdue. At zero, you're grinding metal rotor against metal caliper bracket - an expensive and dangerous situation.
Driving habits, vehicle weight, and terrain all affect how quickly pads wear. City driving with frequent stops accelerates wear far faster than highway miles. Understanding your baseline helps you stay ahead of the replacement window instead of reacting after the fact. For context on other systems that can quietly degrade, see common car ownership habits that lead to costly repairs.
What you will need
What to Look and Listen For
Brake wear announces itself in a predictable sequence. Knowing where you are in that sequence helps you calibrate urgency.
Squealing or High-Pitched Screeching
Most pads include a small metal tab called a wear indicator. When friction material thins to roughly 2-3mm, this tab contacts the rotor and produces a high-pitched squeal - by design. It's not a malfunction; it's a built-in alert. If the sound appears consistently when braking and doesn't go away after the first stop of the day, take it seriously. Occasional squealing on first morning braking (from light surface rust) is normal and typically clears quickly.
Grinding or Growling
If squealing has progressed to a harsh grinding or metallic growling, the pad's friction material is likely gone and the metal backing plate is contacting the rotor directly. This causes rotor damage that often requires resurfacing or full replacement - compounding repair costs significantly. Don't delay at this stage.
Pulling to One Side
If the vehicle pulls left or right during braking, one side's pads may be wearing unevenly, or a caliper may be sticking - applying pressure on one wheel only. This is both a wear signal and a handling safety concern. Dashboard warning lights can sometimes accompany brake issues in vehicles with electronic brake-force distribution systems.
Vibration or Pulsing Through the Pedal
A pulsing or vibrating brake pedal typically points to warped rotors - often caused by overheating from metal-on-metal contact or prolonged hard braking. The rotors develop uneven thickness, and you feel that irregularity through the pedal.
Spongy or Low Pedal Feel
A pedal that sinks unusually far before engagement can indicate air in the brake lines or low brake fluid - often a consequence of severely worn pads. This is a hydraulic system concern that warrants immediate professional inspection.
Build Brake Checks Into Your Routine
Pair a brake visual inspection with every tire rotation - typically every 5,000-7,500 miles - and you'll almost never be caught off guard by sudden wear. Many tire shops will note pad thickness as part of their standard rotation checklist if you ask. This habit costs nothing and takes less than five minutes.
How to Visually Inspect Your Brake Pads
You don't need to remove a wheel to get a useful visual read on pad thickness. On most vehicles, you can see the pad through the wheel spokes.
Park safely and let the brakes cool
Choose a level, well-lit surface. If you've been driving, wait at least 30 minutes before inspecting - rotors and calipers retain significant heat after use and can cause burns on contact.
Look through the wheel spokes at the caliper and rotor
Crouch beside each wheel and look inward. You'll see the rotor (a flat disc) and the caliper (a clamp-like assembly) hugging each side. The brake pad is the material sandwiched between the caliper's inner surface and the rotor face.
Estimate pad thickness
Look at the friction material - the composite layer pressed against the rotor. A healthy pad has roughly 6mm or more of material visible. If the pad appears thinner than a standard pencil eraser (approximately 3mm), it's time for replacement. If you can barely see any friction material at all, treat this as urgent.
Check all four corners
Brake wear is not always even across axles or sides. Front brakes typically wear faster because they handle more braking force. Check both front wheels and, if visibility allows, both rear wheels. Record what you see - even rough mental notes per corner help you track progression over time.
Inspect the rotor surface while you're there
Glance at the rotor face for deep grooves, heavy rust buildup beyond surface oxidation, or a pronounced lip around the outer edge. A slight surface rust film is normal after sitting overnight. Consistent deep scoring parallel to the rotor's rotation indicates pad material has worn through and metal contact has occurred.
If your vehicle has hub caps or solid wheel covers that block the view, a wheel removal may be needed for a proper visual - a task typically performed during tire rotations. Ask your mechanic to call out pad thickness during any routine service visit. You can also complement brake checks with a broader tire safety review using this driver's field guide to tire pressure and tread depth.
Don't Rely on Sound Alone
Not all worn pads squeal audibly before they reach a critical state. Worn wear indicators, aftermarket pads without built-in tabs, or consistent background road noise can all mask the warning sound. Visual inspection provides the most reliable baseline regardless of what you do or don't hear during driving.
For a broader look at all the systems your dashboard monitors, understanding your dashboard warning lights is a practical companion resource.
When to Call a Mechanic
Visual inspection and listening for warning sounds are genuinely useful, but they have limits. A professional inspection is the right call in any of these situations:
- You hear grinding and can't confirm how much pad material remains
- The vehicle pulls to one side during braking regardless of pad thickness
- The brake pedal feels soft, spongy, or sinks unusually far
- You notice brake fluid pooling under the vehicle or a sudden drop in the reservoir level
- Pad thickness appears at or below 3mm on any corner
Brake repairs are firmly in the category of work where DIY has a high safety bar. Bleeding brake lines, replacing calipers, or resurfacing rotors require proper tools, torque specifications, and mechanical knowledge. If you're not experienced with brake system work, having a qualified technician handle replacement is the right call - not a sign of inexperience, but sound judgment. This guidance fits squarely within the broader principles of driving safety that protect you and others on the road.
This article provides general vehicle maintenance information for educational purposes only. It is not a substitute for professional mechanical inspection. Always consult a qualified mechanic for diagnosis and repair of your vehicle's braking system.
The content provided on our blog site traverses numerous categories, offering readers valuable and practical information. Readers can use the editorial team’s research and data to gain more insights into their topics of interest. However, they are requested not to treat the articles as conclusive. The website team cannot be held responsible for differences in data or inaccuracies found across other platforms. Please also note that the site might also miss out on various schemes and offers available that the readers may find more beneficial than the ones we cover.